Recent Posts

fredag, januar 15, 2010

NEW Cosmo Cricket!!!


I'm SO excited about all the new Cosmo Cricket lines this spring. LOVE, LOVE, LOVE them all. And all those yummy, yummy chip letters! Run over to the Cosmo Cricket blog to see all the awesomeness :)
I've been SO lucky to play with some of the beautiful papers allready :) :)
A little LO with some Joy Ride, and a minialbum using Garden Variety.
:)


torsdag, januar 14, 2010

bread and ATC

Made this ATC inspired by Ronda and her Inspire ME 2010 project. This weeks promt is "happiness is..............." and she have a great tutorial on the coolest tissue-paper technique on her blog :) :)
This picture was taken for this weeks "selfportrait tuesday" - it's all in the eyes -. YES, I'm totally aware it's not tuesday today..... LOL Time just flew by so fast this week....

Did you know I love to bake. To bake bread is one of the things that really makes me feel relaxed and happy....and useful. LOL. And my family get happy too...They all love homemade bread. :) :)
I have a few favorite recepies, but most of the time i just improvise. :)

Here are two of my favorites, one in norwegian and one in english ;)
ENJOY!

FOUR grain bread
  • 2 1/2 cup(s) flour
  • 1 cup(s) whole wheat flour
  • 1/4 cup(s) coarse cornmeal
  • 1/4 cup(s) old-fashioned rolled oats
  • 1 tablespoon(s) old-fashioned rolled oats
  • 1/4 cup(s) wheat germ
  • 1/4 cup(s) brown sugar (packed)
  • 2 1/2 teaspoons instant active dry yeast
  • 2 teaspoons salt
  • 2 tablespoon(s) honey
  • 1/2 cup(s) buttermilk, warmed to 100 degrees F.
  • 3/4 cup(s) (add more as needed) spring water warmed to 100 degrees F.
  • 1 tablespoons vegetable oil
  • 1 egg
  1. Make the dough: In a large bowl or food processor, combine the flours, cornmeal, 1/4 cup oats, wheat germ, sugar, yeast, and salt. In a small bowl, combine the honey and buttermilk and stir into the dry mixture. add the Water 1/4 cup at a time until a dough comes together. On a work surface lightly dusted with whole-wheat flour, knead dough by hand until glossy and elastic -- about 10 minutes -- or process in food processor for 45 more seconds.
  2. Proof the dough: Coat a large bowl with the vegetable oil. Shape dough into a ball and place in the bowl, turning dough to coat all sides. Cover bowl with a clean, damp kitchen towel and let rise in a warm, draft-free place until doubled in size -- aprx 1 hour.
  3. Form the loaf: Punch down the dough and shape into a tight ball. Sprinkle a baking sheet with cornmeal. Shape the dough into a 10-inch oval, tapering the ends, and place on the baking sheet. Cover with damp kitchen towel and let rise in a warm, draft-free place until doubled in size -- about 20 minutes.
  4. Bake the bread: Preheat oven to 350 degrees F. In a small bowl, lightly beat egg with 1 tablespoon of water. Brush loaf with egg wash and sprinkle with remaining tablespoon rolled oats. Using a sharp knife, cut 3 diagonal slashes in the top of the dough. Bake in the lower third of the oven until the loaf is golden brown and sounds hollow when lightly tapped -- 50 to 60 minutes. Cool on a rack. Serve at room temperature or toasted. Store in an airtight container.
This recipe was found in Country Living magazine :) :)

Now for my norwegian friends:
HJERTEBRØD

5 dl vann
4 ss olivenolje
1ss honning
1 pose tørrgjær
9 - 10 dl hvetemel
2 1/2 dl grov sammalt rug
1 neve sesamfrø
1 neve linfrø
1 neve solsikkekjerner
1ss havsalt

- varm vannet til ca 40 grader
- tilsett olje og honning
- bland alle de tørre ingrediensene i en bolle (hold igjen litt av melet)
- tilsett den lunkne væsken og elt godt
-hev deigen i ca 1 time
-bak ut brød i hjerteform eller vanlig brødform :)
-etterhev brødet i ca 20 minutter
-forvarm steikovnen til ca 200 grader celsius
-sett brødet midt i ovnen og senk tempraturen til 175 grader.
-stek i ca 45 minutter, eller til brødet høres "hult" ut når du banker på det. :)

:)


onsdag, januar 13, 2010

EDVIN the man

Happy birthday, dear Edvin!!

Edvin fyller 14 år idag, gratulerer masse med dagen!!

:)

mandag, januar 11, 2010

Inspiration monday #2 get organized ;)


Hi my friends!! And welcome to this inspiration monday #2 :)

It's still early in january, and I haven't forgotten all about my new years resolutions... yet...
LOL
If you are like me you have alot on your plate during the week. And as a mother of 4 busy kids I really need a bit of organization.
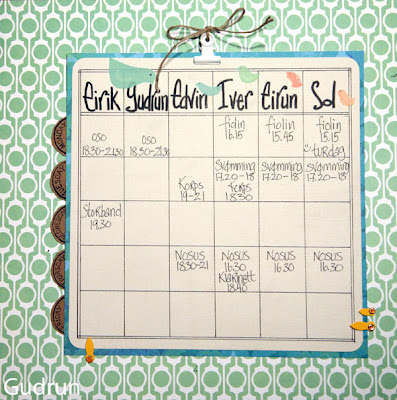
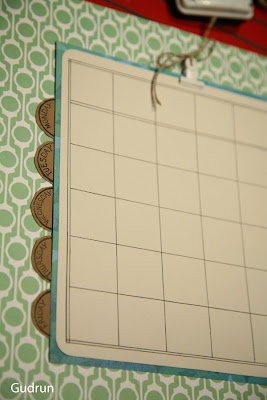
So to keep track of all the appointments during the week I've made this week-planner.
This is a planner for all the things we do same day, same place every week, so I don't have to put that up in my calendar. I just keep this planner hanging along with my calendar, and I'll
keep track of all the stuff we do on a regular basis. :)

So today I'll share this little week-planner with you.
So simple, but yet so helpful. ;)

What You'll need:
1 white or cream cardstock 8" X 8"
2 sheets of 12" X12" patterned paper of your choice
2 eyelets
1 binder-clips
a piece of twine
day-stamps (mine are by Purple Onion)
photo-holders and brads
black pen
rubons

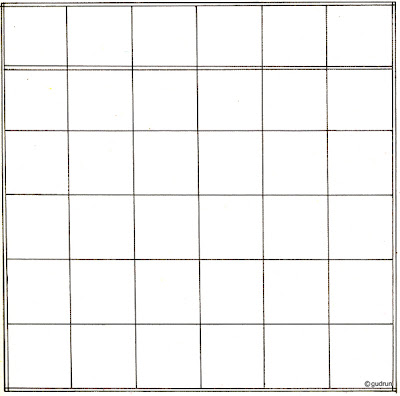
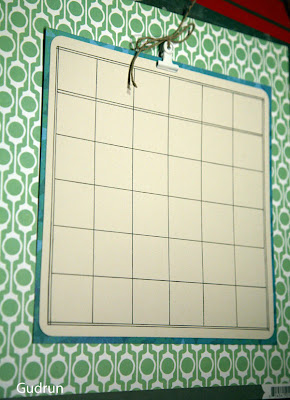
I made my plan simply by drawing this grid to a 8" X 8" cardstock. You can download and print this grid on to your cardstock if you like, or you can draw your own, perfect for your own use. :)

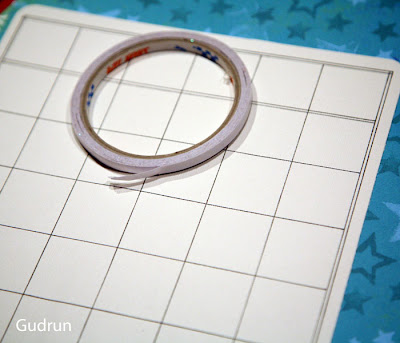
I rounded the corners of my cream cardstock and added the grid on top of my turcouse patterned paper - just left a tiny frame of turqouse around the cardstock.
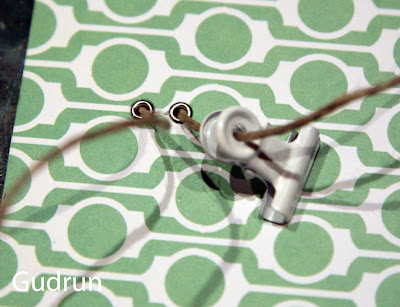
I made two holes and add eyelets on the upper part of the patterned paper I decided to use as my background-paper.
I placed the holes a little bit right of the center, to make room for the date-stamps on the side of the grid-plan.
Tied the binder-clip to the paper with the twine.
Now you can place your planner in the middle of the background paper, and secure it with the clip.
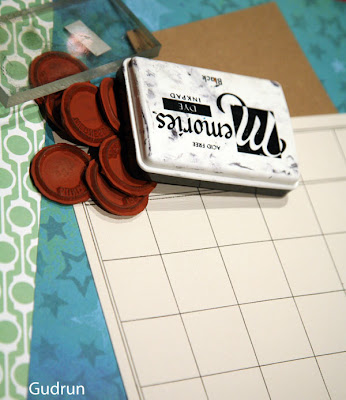
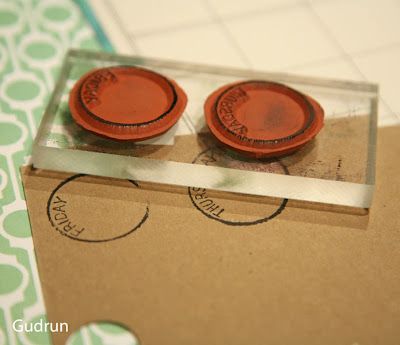
Stamped Monday - Friday with my purple Onion date-stamps on a craft cardstock.
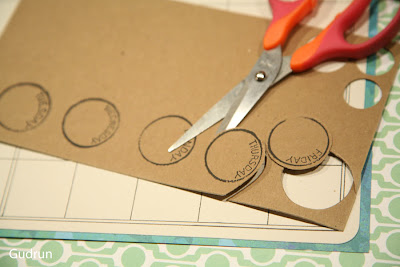
cut out all the circles / stamped images

Added the circles to the edge or my planner.
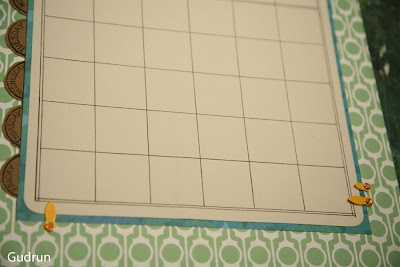
To add some drops of color and to secure the grid-cardstock (because I haven't glued it to the background - I wanted it to be changeable) I added 3 yellow photo-holders
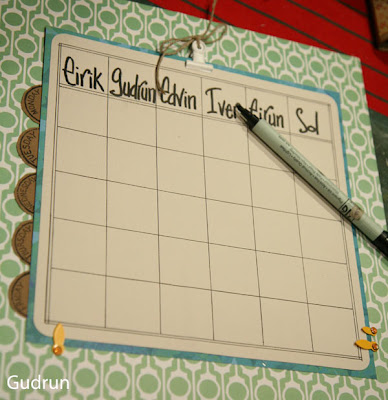
Write the names in the uper part of the grid
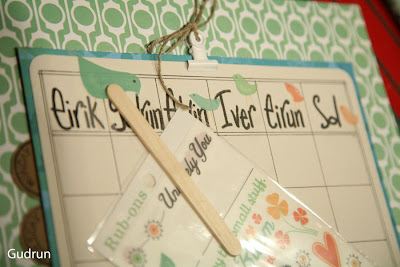
Decorated with my favorite Cosmo Cricket rubons. :)
VOILA!
Planner is ready to use.
Just add your regular plans to the spaces on the planner.

I keep mine by the phone, so I won't miss out on anything ;)

Thanks for popping by!
Happy creating - and have a wonderful week!!

xo

søndag, januar 10, 2010

Weekend joy and "Eplekake"

It was beautiful weater in Oslo this weekend. Freezing cold, but still white and beautiful winter-weather. We used the spare daylight to enjoy the great outdoors :) Here is a pic of DH and Sol on the sledge - must say this is the best kind of transportation these days. LOL
And because it is weekend we needed some yummy food to eat. We had hot cocoa and apple-cake. Mmmmmmm. Hope you have a wonderful weekend too. I'll leave you with my favorite apple-cake recepie. ENJOY!!
xo

Gudruns favoritt-EPLEKAKE

350 g hvetemel - 12,3 ounces flour
2 ts bakepulver - 2 teaspoons baking soda
1 ts kanel - 1 teaspoon ground cinamon
1/2 ts salt - 1/2 teaspoon salt
200g smør - 200 gram softened butter
250 g sukker - 8,8 ounces sugar
50 g brunt sukker - 1,75 ounces brown sugar
4 egg - 4 eggs
1 1/2 dl melk - 0.6cup milk
4-5 epler - 4-5 apples

-Bland alle de tørre ingrediensene i en bolle
-visp sammen smør og sukker til en luftig krem
-tlisett ett egg av gangen mens du stadig visper smørkremen
-tilsett melken
-Rør alle de tørre ingrediensene forsiktig inn i blandingen.
-Del eplene i båter
-fordel kakesmeten i en liten langpanne og stikk alle eplebåtene ned i smeten.
-dryss over kanel og sukker.
-stek kaken på 180 grader celcius i ca 40 minutter.
:)

-add flour, cinnamon, salt and bakingsoda to a bowl
-mix sugar and butter in another bowl until light and "creamy"
-add one egg at the time to the butter/sugar mixture
-add the milk
-gently mix flour, cinnamon and baking soda with the creamy mixture.
-Cut the apples
-add the mix to a small baking-pan and add the apples
-add a sprinkle of sugar and cinnamon on top.
-bake on 356 degrees Farenheit in aprx 40 minutes.
ENJOY!!

(I've tried to convert all the amounts and translated this recepie - I may have done things wrong, so please notify me if you find any mistakes, and I'll correct it)

See you tomorrow for a new "inspiration monday" :) :)

lørdag, januar 09, 2010

saturday allready


Can't believe it is saturday already! WOW. This week has flown by SO fast.
It's absolutely freezing cold here in Oslo these days. -15 to -20 degrees celsius, so I've been busy keeping the fire going to keep my house warm and cosy. It's so cold my car froze!! I was planning to do some shopping - I went out, started the car, the engine ran, but the car wouldn't move....so strange. It took about 30 minutes with the engine on, and then it was all good.

Anyhow, the sun is shining, we have lots of snow, and it's all beautiful!! The kids LOVE it, we can use the skis and sledges and skates every day.
It's nice weather to be indoor creating too :)

I decided to join my friend Ronda on her creative ATC-journey.
I have never been into ATCs, but I really enjoyed making my first one :)
You should absolutely visit Rondas blog - SO super inspiring!!
You can see my first ATC above.
I have written some thoughts on the word DO on the back on the card, and I think I'll keep it this way as a mini art-journal.

Here is a LO i made for this weeks challenge over at LOTUS Paperie. Awesome sketch. Don't miss out on this one - so make sure you jump over and play along at LOTUS blog and upload you creations at the Flickr gallery :)
Picture of my mother ice skating with the kids. How many grandmothers do ice skating? Not many that I know.... The kids love it, and adore her old white figure skates :)
Have played alot with my Cosmo Cricket stuff lately too. Needed to make a really summery LO now. At least it made my heart warm to find these happy pictures :)

Have a wonderful weekend.
xo

mandag, januar 04, 2010

Inspiration monday #1 :)

Hi my friends, and welcome to the very first inspiration Monday! :)
As I promised you yesterday I'll show you how to make this cute and simple "love" album.
You'll need
Patterned paper, I've used Cosmo Cricket "early bird" Craft kit
1 sheet of Cardstock, I've used Bazzill red
Alpha stickers, I've used Pink paislee and American Crafts thickers
felt heart
jumprings
hole-punch
Print out the envelope-pattern. It will make the base for all the pages in the album
Cut out pattern and transfer to backside of the patterned paper you want to use as your minialbum pages.
You can draw the pattern, or simply print it on the back of the paper.
Each envelope will measure aprx 9x7cm ( 3,54 inch x 2,8 inch )when folded.


I've made 5 envelopes,. but you can make as many as you like. Cut and fold all the envelopes.

I've used my 1 inch circle punch to make a half circle on the top of the envelope.

Glue the bottom and sides of the envelopes.

Now we are ready to make the cover. Cut two pieces of patterned paper, same size as the envelope, aprx 9x7cm. glue the pieces of patterned paper on to the cardstock and cut around, leaving a little frame of cardstock around the patterned paper.

Add pictures, textboxes, titles and what ever you want to put on your envelope-pages.
Make holes trough the covers and all the pages using your hole-punch.
I've binded my album with two jumprings.

Embellished the front of my album with a large felt-heart. Used some Velvet Thickers as title. Added the title to a tiny strip of patterned paper, and glued it on to the felt-heart.

I finished up all my pages, added some titles and little embellishments.
Here are all my finished pages for the album.
I have planned on making some tags with journaling to put inside the envelopes.


Hope you've enjoyed this little tutorial.
I hope I'll manage to make this a habbit, and post one new tutorial every monday.
Have a happy week.
xo